Sunday, 26 February 2017

puppet making


After the puppet was layered up enough the armature was added with a foam build up and again latex was layered up slowly to fill the gaps before joining the two halfs together.

the hands didn't turn out too well, so I cut them off and built them back up using the dip method to create thinner more realistc fingers.


I decided to use felt to create the character hair as is best matched the look of the design. his glasses made from wire.

he is a bit bumpy on his body, which was a bit disapointing, but the face and hands which are on show, I spent time with them making sure they were as smooth as I could get them, as theese will not be covered up by clothing.

next steps are to make his clothes, eyes and begin the monster character.


Thursday, 23 February 2017

Time planning - Feb review


At the the minute we are getting on quite well, the set and puppet are still in the process of being made, which is okay because the animatic still needs to be completed which Callum is cracking on with. He also sorted out the voice over which will be put with the animatic to show in two weeks time. 
  
I'd like all the set to be made for the presentation on the 9th, so after then we can get on with animating. Callum is animating the flashback scenes as soon as and me and Wing are getting on with set and prop making, we're focusing on getting the larger objects done now we have some small props, so it's just realy continuing to get on and build.

Although my time plan might suggest we are behind, I do like to set myself deadlines a weeks before we really need them, to to be on the safe side incase we do get slowed down in some way. As long as it's done by the presentation, everything should be fine. 

Monday, 20 February 2017

set making - stairs


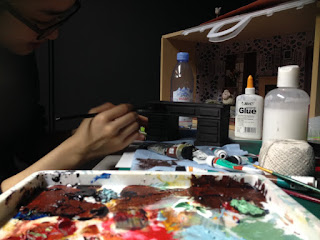
Designing the stairs took a lot of thought, and referencing,I tried to copy victorian styled staircases as best I could. one problem I have now is to attach the railing, I did try to solder it together, but I couldn't head up the aluminium wire to melting point, so I will have to find an alternative.

I also decided to make in in mount board because the staircase is purely decoritive, so it doesn't need to be strong enough to hold the weight of a character. I it had need to be use, I would have made it from wood. 
I did try to solder the railing together but because the wire is alluminum, I couldn't heat it up enough to connect, even with a soldering gun.

so I simply taped the two parts together and took it to the garden to spray paint it. I chose black to replicate an iron staircase that I saw when researching victorian spiral staircases. Althought it's not as decorative as victorian staircases, for a prop in the background, I'm really pleased with the outcome and think it'll look great when put into the set. 

Puppet making


Because i want to make the puppet out of rubber liquid latex, because I feel it will give a more realist, weathered look to the puppet of the animation, which will add to his adventurous background. 

I wasn't sure how to make the hands successful to be able to hold a pen to write with, my first idea I was half way there with what would work, but connecting the other fingers woulnd't have been sucessfull, so I change the whole arms to 5 strands of the 1mm wire to make a sturdy enough arm and then created fingers from each strand.


I used milliput to build up the 'boned' areas of the puppet so he's not able to bed in these places.


To make his skin, I am layering up the latex bit by bit so it dries properly and created a detailed puppet. the armature will be added when it is built up enough, and then laytex will build round the gaps before putting the two parts togehter. 

Tuesday, 14 February 2017

Set making - desk and chair


To plan out each item of furniture, I drew out to scale, all the pieces needed to create it. and followed the measurements on to thing wood. I picked out wood instead of mdf because when painted it will still show though the texture, to make it look like a proper piece of victorian furniture. 


To provide some support however, I layered up two piece of wood for the top, as the puppet will be resting against this desk, it need to be strong, and also look real as it will be in majority of the shots.


Wing was then in charge of painting ant adding any fabric like for the chair. I showed her the image I used as reference, and she followed it or colour, adding some lighter and darker strokes to add a more wooden texture.

Thursday, 9 February 2017

Pop up exhibition


The purpose of the artbooks was to put along with a pop up exhibition. Because I on puppet and set making I didn't really have any strong images to put up, so me and Callum brought the set down to exhibit. it's still in it's early stages and it was suggested to us to put more in it. I printed out the floor plan of the set to add some colour and demonstrate what we want it to look like. along with the props I made and some some wallpaper samples Callum printed, it came together quite nicely.


Wednesday, 8 February 2017

Artbook


I put together the art book, so it was my responsibility to collect images and lay out the pages appropriately. it shows our process so far, and becuase there were four of us working of different tasks, we had a loot of process to show. Callum put some words together to explain his ideas as writer and director.

Monday, 6 February 2017

prop making


I began making the props myself with fimo as I knew it would be better to create what we wanted at the appropriate size instead of searching the internet for some, Fimo is great from making custom props as you can literally make anything. I had the puppet design at it's actuall size to hand so I could refer to it for proportion.

I added some research images to my pinterest board for the project to help with reference and ideas, and got making. 


Prop designing


Again taking influence from the moodboard and description from the storybaord, I set out sketching some props to live in the characters study, all taken as souvenirs from his adventures, or items you would find in a typical victorian study. Plants, skulls and fossils are some of the key things I saw, so I drew them before sculpting to get the prop right, sometimes like with the candles, I can to go with what the material allowed, and becuase the props are quite small, this mean not a lot of detail.

Saturday, 4 February 2017

Tchaikovsky puppet


Callum Had talked alot about how he liked the look of Barry Purves' Tchaikovsky puppet. So I looked at this character for reference with material planning. He's a larger puppet than the one I'm creating, so I hope it will still move well and look a good quality, despite being made from one mould and with wire armature.


Friday, 3 February 2017

Mould making

When we were happy with the character sculpture it was then ready for moulding. using the knowledge I learn from creating pervious puppets, I placed the charter on a clay base so there is a place for the liquid latex to be poured in when it comes to making the final character. I used card to build a wall round for the silicone and added clay blocks to put below and above the character to save on the amount of silicone used.


art book research.


To help me with organising the project art book, and including the right content in appealing layouts, I researched existing art books to look at how they have previously been done.

one artbook I particularly admired was the Fantastic Mr Fox book, it had one large image for each main character(s)as if to introduce  their chapter of the book. I like this an included fill page images in this project's book to have strong images stand out.

I did reach a point on the last few pages where I didn't know how to display the set making process. but I did find one image in an art book, where they had a section of the film's set and had arrows from  it to show the smaller props in bigger detail. Again I took inspiration from this and included a sketch of the set with props I'd made places around the image, to say this set will be filled with obscure items such as these.


Wednesday, 1 February 2017

Set making - windows


I took influence from one of the photos I had found while research and used it to guide me when designing for the set.

I made sure I had set me art board to the size of the wall it would be cut on. 

When it came to lazer cutting and I sent it to cut. if begin in the corner so I stopped it immediately. 

I was told that there had to be a starting point on the design, so the mdf pannel was measured and a rectangle of that size was added to the design, I didn't was this to cut or engrave to set it to a colour that would act as a guide. we were back on track and the windows began to cut. 


Because we only had the one board I thought that the mistake will be covered over by wallpaper or can be set to the back, so it will not be seen.